
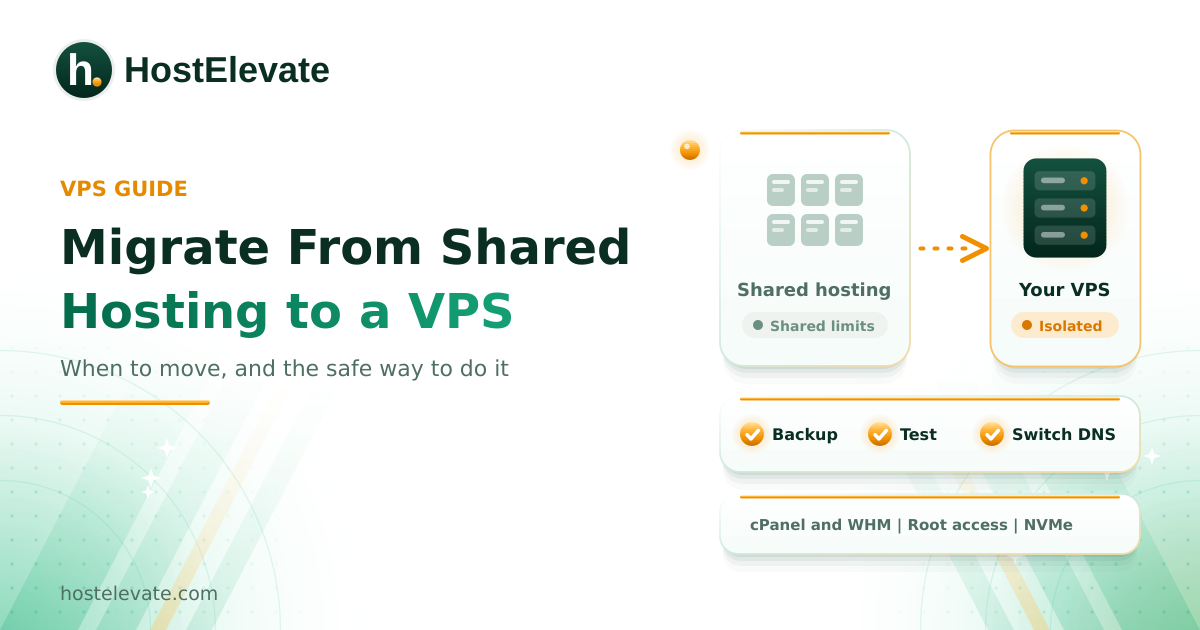
To migrate from shared hosting to a VPS, back up your site, build and test the new server, then switch DNS and keep the old account until everything works. Move when your site keeps hitting shared-hosting limits or needs root access, not just because pages feel slow. Done in that order, a VPS migration takes a few hours of work and very little downtime.
Below you will find the exact steps first, then the background on shared hosting versus a VPS, when to upgrade, what to check beforehand, and how to fix common problems afterward, so you can follow the process without guessing.
Table of Contents
- What Is VPS Migration, and Why Is It Important?
- How to Migrate From Shared Hosting to a VPS
- How to Test Your VPS Migration Before Changing DNS
- How to Point Your Domain to the New VPS
- Shared Hosting vs VPS Hosting: What Is the Difference?
- When Should You Migrate From Shared Hosting to a VPS?
- What to Check Before a VPS Migration
- Common VPS Migration Problems and How to Fix Them
- What to Do After the VPS Migration
- Is a Managed VPS or Unmanaged VPS Better?
- Frequently Asked Questions
- Summary:
What Is VPS Migration, and Why Is It Important?
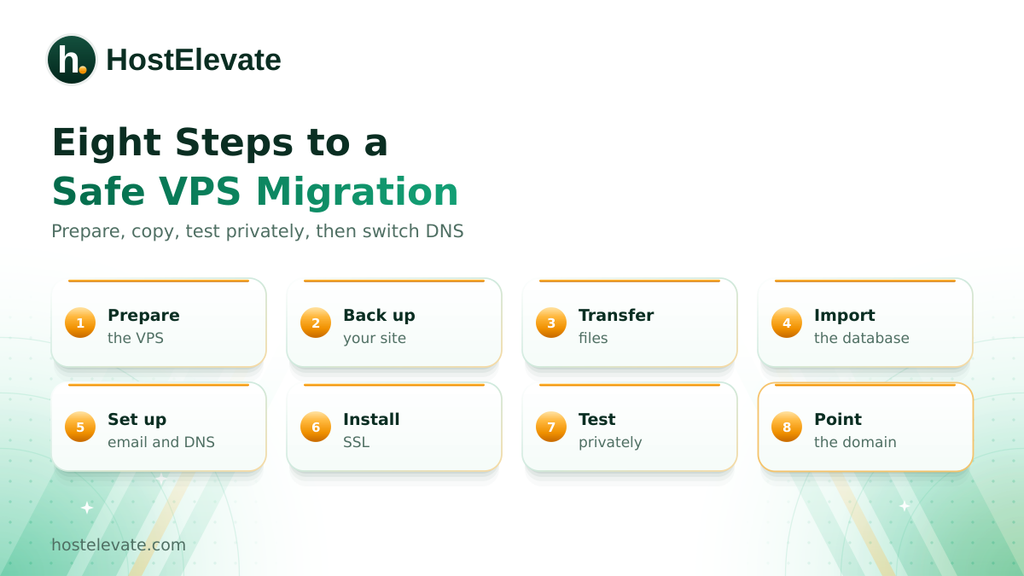
VPS migration is the process of moving a website from a shared hosting account to a Virtual Private Server, which is an isolated virtual server with its own allocated resources. It involves more than copying files: you also move databases, email, scheduled tasks, and DNS settings, then test the new server before visitors reach it.
It matters because a VPS can give your site more predictable resources and more control, but only if the move is done carefully. A rushed VPS migration can break email, lose recent data, or leave a site slower than before.
How to Migrate From Shared Hosting to a VPS
Follow these steps in order. The safest VPS migration is staged: prepare the new server, copy the site, test it privately, and change DNS only when the new environment works. The first six steps are below, and testing and the DNS switch follow in their own sections.
Prepare the new VPS
Start the VPS migration by provisioning the VPS with a supported operating system and the software your site needs. For a typical PHP site that means a supported Linux distribution, a web server such as Apache, Nginx, or LiteSpeed, a compatible PHP version and extensions, MySQL or MariaDB, a firewall, SSL support, and a control panel if you want one. Match the important software versions of your current host, and test any PHP or database upgrade separately.
If you want your VPS migration to start with the control panel already set up, consider cPanel VPS hosting with the license included, which comes with cPanel and WHM installed, full root access, LiteSpeed, NVMe storage, and a configured firewall before you log in. Make a full inventory of your current account first, as described in the section on what to check before a VPS migration.
Create a full backup of your existing site
Before any VPS migration begins, back up the whole hosting account. For WordPress, the backup needs both the website files (themes, plugins, uploads, and configuration files) and the database, because downloading only the site folder leaves out your posts, pages, and settings. Keep an extra copy outside the old account and confirm the files are complete. Our website migration checklist lists every backup item to cover.
Transfer your website files to the VPS
Once the server is ready, copy the files for your VPS migration. Depending on your setup, you can use a full cPanel account transfer, SFTP or SCP, an SSH-based copy, a provider’s migration service, or a compatible backup and restore tool. If both servers run cPanel and you have root access, WHM’s Transfer Tool at WHM then Home then Transfers then Transfer Tool copies whole accounts. If you only have user credentials, use WHM’s Transfer or Restore a cPanel Account interface instead.
Know what the tool does not move. According to the official cPanel Transfer Tool documentation, it does not transfer custom DNS zone templates, and it keeps PHP-FPM settings in a separate file that you must restore by hand. Its Live Transfer feature helps reduce downtime but suspends the transferred accounts on the source server, so keep your own backup if you want the old site to stay live during testing. For a manual move, copy the full site folder to the correct document root, then check file ownership and permissions, because wrong permissions can stop the web server from reading files.
Create the database and import your data
Create a new database and user on the VPS, import your backup, and assign the right privileges. Then update the application’s database settings and confirm that it can connect. For WordPress, review wp-config.php, because the name, user, password, and host must match the new environment. A database connection error after a VPS migration almost always comes from one of those four values.
Configure email accounts and DNS records
Email needs separate attention in any VPS migration, because website files and databases do not carry your whole email setup. If your mailboxes lived on the old shared server, recreate them on the VPS or set up your new email service. Check mailboxes and storage, existing messages and folders, forwarders and autoresponders, MX records, SPF, DKIM, and DMARC, and the mail routing settings. Also record your current DNS zone, including custom records for subdomains, verification services, and external email providers.
Install and verify an SSL certificate
Your site should have a valid certificate on the new server before the DNS switch in your VPS migration. Configure HTTPS and verify that the certificate covers the right domain, the chain is valid, HTTP redirects to HTTPS, internal resources load securely, and no mixed-content warning appears. If you use an automated free certificate service, confirm that its domain validation can complete, which usually requires the domain to point at the new server. On cPanel servers, AutoSSL can handle this once DNS is live.
How to Test Your VPS Migration Before Changing DNS
Do not change DNS right after the files arrive in a VPS migration. First test the VPS with a temporary URL, a preview environment, or a hosts-file override that sends only your computer to the new server. This lets you check everything before normal visitors arrive. Our guide to migrating a WordPress site without downtime shows the hosts-file method in detail.
Use this VPS migration checklist:
| Test | What to verify |
| Homepage and pages | Load correctly, and existing URLs and content work |
| Images and media | Files load from the new server |
| Database and login | The application connects, and admin and user sign-in work |
| Forms and email | Submissions are processed, and mail sends and receives |
| SSL and redirects | HTTPS is valid, and HTTP, HTTPS, and www rules work |
| Cron jobs | Scheduled tasks run correctly |
| Performance | Pages and database requests respond normally |
For WordPress, also check the dashboard, permalinks, plugins, and scheduled publishing. For an online store, test checkout in a safe test mode and verify that order data is handled correctly. If you use caching, clear the old cache and configure the new server’s caching before you judge performance.
How to Point Your Domain to the New VPS
Once testing passes, finish the VPS migration by updating the domain’s A record to the VPS IPv4 address, and review the AAAA record too if you use IPv6. If a third-party provider manages your DNS, you can usually keep the existing nameservers and change only the needed records.
Update DNS and monitor both servers
DNS changes do not reach every resolver at once, so some visitors will still see the old server for a while. Keep the old account running and watch both environments during the transition. Our guide to https://hostelevate.com/domains/dns-checker/ it explains how long it takes and which tools show the result.
Keep the old hosting account active
Do not cancel shared hosting right after the VPS migration changes DNS. Some visitors, email systems, and cached resolvers may keep reaching the old server temporarily. Keep the account until the site works on the VPS, email is flowing, forms and applications work, no recent submissions are missing, and DNS resolves as expected. Only then cancel the old service.
Shared Hosting vs VPS Hosting: What Is the Difference?
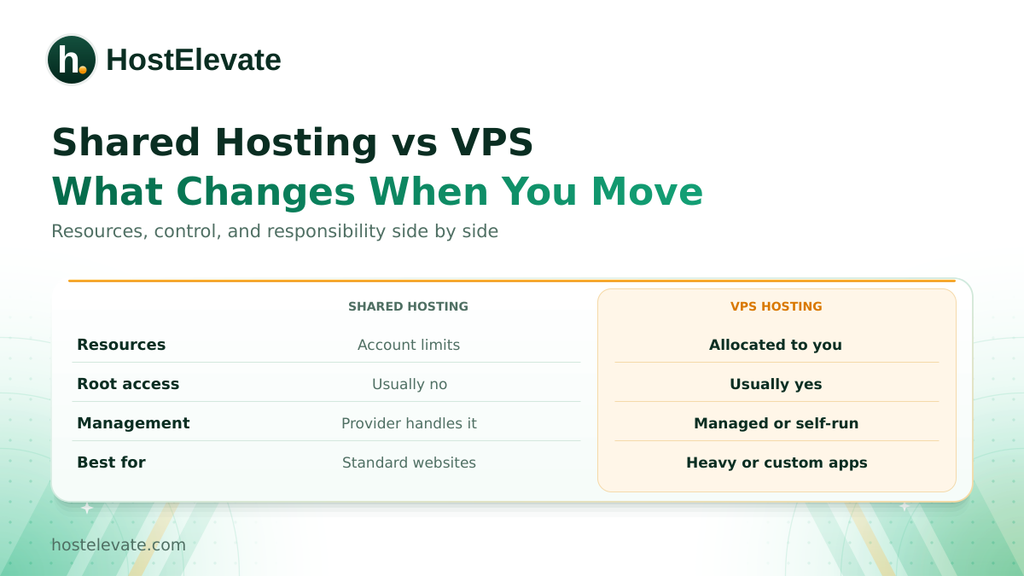
Shared hosting and VPS hosting differ in resources, control, and responsibility. On shared hosting, many accounts run on one physical server, and the provider handles the environment, security updates, and most infrastructure work, which suits sites that do not need server-level changes. A VPS uses virtualization to create an isolated server with allocated resources, and depending on the plan you may get dedicated CPU and RAM allocations, root access, and more control over server software.
| Feature | Shared hosting | VPS hosting |
| Server environment | Shared with other accounts | Isolated virtual server |
| Resources | Account limits on shared infrastructure | Allocated according to the plan |
| Root access | Usually unavailable | Usually available |
| Server management | Mostly handled by the provider | Managed or unmanaged, depending on the service |
| Software configuration | Limited to supported options | Greater flexibility |
| Technical responsibility | Lower | Higher, especially when unmanaged |
| Suitable workloads | Standard sites and moderate applications | Demanding sites and custom applications |
A VPS migration does not automatically make every site faster. Performance still depends on server configuration, application code, the database, caching, resource allocation, and ongoing maintenance.
When Should You Migrate From Shared Hosting to a VPS?
Consider a VPS migration when your site keeps reaching the limits of its current environment or needs server-level abilities that shared hosting does not offer. Identify the real cause first, because a poorly configured site can stay slow on a more powerful server. If you are unsure whether the problem is your host at all, our guide to the signs it is time to switch web hosts shows how to tell.
Your website regularly reaches resource limits
Repeated CPU, RAM, entry process, or I/O limits suggest the site needs more than the plan allows. Check the resource usage reports in your control panel and look for limits reached during normal activity, not one short spike. If usage stays high after you optimize plugins, scripts, images, and caching, a VPS migration is a reasonable next step.
Performance drops during traffic spikes
A site that runs well when quiet but slows when visitors arrive may benefit from more predictable resources. The application must still handle concurrent visitors efficiently, so review traffic patterns, response times, and database activity before you pick a configuration.
You need root access or custom server software
Shared hosts restrict some server changes to protect other customers. A VPS may suit you if your application needs:
- Custom PHP or other runtime configurations.
- Specific server packages or extensions.
- Background workers and long-running processes.
- Custom firewall or service configuration.
- More control over web server settings.
Root access also brings responsibility, because a wrong server setting can affect security, performance, and availability.
You need more predictable resource isolation
A VPS gives you an isolated virtual environment, although the physical hardware is still shared with other virtual servers. That usually means more predictable resources than a shared account, but not unlimited performance, and not immunity to hardware or network problems.
What to Check Before a VPS Migration
Preparation is the most important part of any VPS migration. Before you order a server or move anything, document your current environment.
Check your current resource usage
Review CPU and memory usage, disk space and inode usage, database size and activity, monthly bandwidth, the PHP version and extensions, and your traffic and peak periods. This tells you what the VPS needs. Do not choose a VPS on advertised storage or memory alone, and leave room for normal growth.
Make a complete website inventory
List everything that runs under your hosting account:
- Main domains, addon domains, subdomains, and their document roots.
- Website files and uploaded media.
- MySQL or MariaDB databases, users, and permissions.
- Email accounts, messages, forwarders, and autoresponders.
- Cron jobs and scheduled tasks.
- DNS records, nameservers, SSL certificates, and redirects.
- FTP or SFTP accounts and application configuration files.
This step matters because a move can look successful while supporting services are still on the old server.
Choose the right VPS configuration
| Resource | What to consider |
| CPU | Application workload, concurrent requests, and background processes |
| RAM | Web server, PHP processes, database, and caching needs |
| NVMe or SSD storage | Site files, databases, backups, and expected growth |
| Operating system | Compatibility with your software and control panel |
| Network capacity | Expected traffic and data transfer |
| Backups | Frequency, retention, and off-server storage |
| Management | Whether server administration is included |
If you prefer a familiar interface, a control panel such as cPanel and WHM works well, but panels can need separate licenses and extra server resources. On HostElevate’s cPanel VPS plans the license is part of the price, and the tier decides how many cPanel accounts you can create: Solo includes 1, Admin up to 5, Pro up to 30, and Premier 100.
Common VPS Migration Problems and How to Fix Them
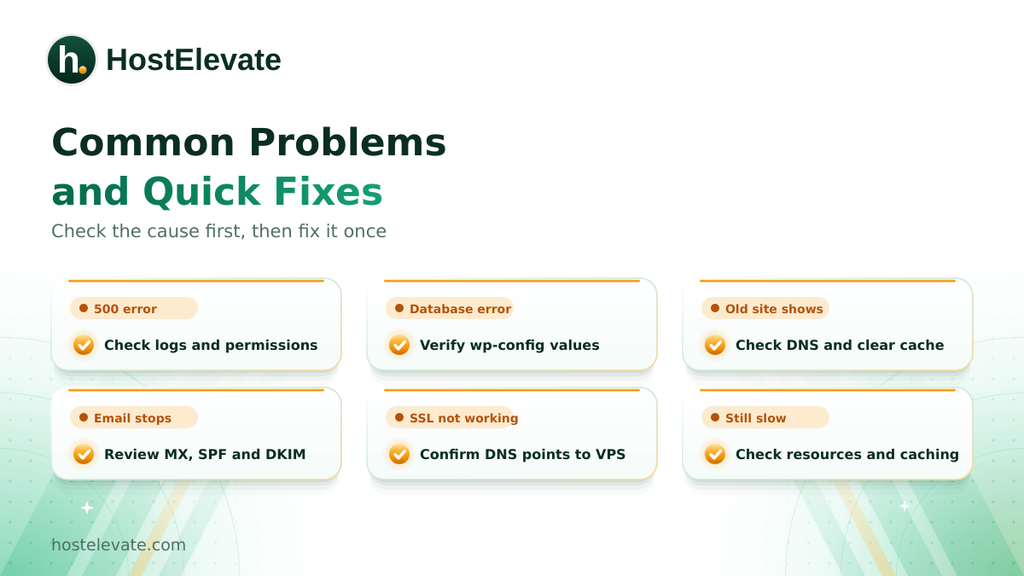
Even a careful VPS migration can produce configuration problems. These are the most common, each with a fix.
The website shows a 500 internal server error
This often means incompatible PHP settings, missing extensions, wrong file permissions, or an application configuration problem. To fix it, read the web server and PHP error logs, check the PHP version and required extensions, verify file and directory permissions, review .htaccess rules if you use Apache, and check the application configuration files.
A database connection error appears
The site cannot load if the database credentials or settings are wrong. Confirm that the database exists, check the username and password, make sure the user has the right privileges, verify the host value, and review the application’s database configuration.
The website displays the old version
Either DNS has not reached your resolver yet, or a cache is serving old content. Check the domain’s current DNS records, confirm the destination IP, clear application and browser caches, test from another network or resolver, and confirm the new server holds the latest files.
Email stops working after the move
Email problems usually come from missing mailboxes, wrong MX records, or mail routing. Confirm every mailbox exists, review MX records, check SPF, DKIM, and DMARC, verify the server’s mail routing, and test both incoming and outgoing mail. Keep the old email service available until delivery is confirmed.
The SSL certificate does not work
A certificate may fail if it was not installed correctly or if the domain still points to the old server. Confirm that DNS points to the VPS, install or issue the certificate there, verify domain coverage and validity, check HTTPS redirects, and remove outdated certificate references.
The website is still slow
A VPS migration does not fix inefficient code, heavy database queries, or poor caching. Check CPU and RAM use, review the PHP and web server configuration, inspect slow queries, set up page and object caching, optimize images and assets, and confirm the VPS has enough resources.
What to Do After the VPS Migration
A VPS migration is not finished just because the homepage opens on the new server. Keep watching the site and its supporting services after the DNS change.
Monitor server resources
Check CPU, memory, disk space, and network use regularly. Find processes that use too much and review whether the configuration suits your workload.
Set up automated backups
After the VPS migration, schedule backups that cover site files, databases, and other important data, and store them off the VPS where possible, because a backup kept only on the same server can be lost with it. Test restoration, since a backup is only useful if it restores. Our website backup guide explains how to verify one.
Apply security updates
Keep the operating system, control panel, web server, PHP, and applications updated. Configure a firewall, restrict administrative access, use strong authentication, and remove SSH accounts or credentials you no longer need.
Review website performance
Compare server response time, page loading, database activity, and resource use before and after the move, and use the results to decide whether you need more optimization or a different configuration.
Is a Managed VPS or Unmanaged VPS Better?
The right option for your VPS migration depends on who takes responsibility for server administration. A managed VPS generally includes help with setup, maintenance, and technical configuration, though the exact services vary by provider. An unmanaged VPS gives you direct responsibility for installing software, securing the server, monitoring services, and troubleshooting, which suits experienced administrators.
Before you choose, ask the provider:
- Who installs and maintains the operating system?
- Who handles security updates?
- Are backups included?
- Is control panel licensing included?
- Who monitors server availability?
- What support is available during migration?
- Are server-level troubleshooting and configuration included?
The cheapest VPS is not always the best fit. Consider the total cost of resources, licenses, backups, administration, and support. Official guidance on the WordPress side of a move is in the WordPress migration handbook.
Frequently Asked Questions
How much downtime should I expect during a VPS migration?
Very little if you test privately first and switch DNS last, since visitors keep using the old site until DNS updates.
Do I need root access to use the WHM Transfer Tool?
Yes, the Transfer Tool needs root access, and users with only account credentials use the Transfer or Restore a cPanel Account interface.
Will my cron jobs and email move automatically?
Not always, so list cron jobs and mailboxes beforehand and recreate or verify them on the VPS.
How many cPanel accounts can one VPS license host?
It depends on the tier, for example Solo allows 1 account, Admin 5, Pro 30, and Premier 100 on HostElevate.
Is a VPS always faster than shared hosting?
No, it helps when resource limits are the bottleneck, but slow code and poor caching move with your site.
Summary: Complete Your VPS Migration Safely
A VPS migration moves your site from shared limits to an isolated server with more predictable resources and more control, but it works best when you start from a clear picture of your current hosting limits. Back up the site, prepare the VPS, transfer files and databases, configure email and DNS, install SSL, and test everything before you send visitors to the new server.
Keep the old account active during the VPS migration transition, then monitor resources, backups, and security after the switch. If you would rather have engineers handle the technical work, the cPanel VPS plans include free migration of your cPanel accounts, with files, databases, email, and DNS records moved while your old server stays live until everything is checked.